I darkened two circles for the same question during my first AIMS ATMA OMR Sheet mock attempt, telling myself I would decide the final answer later and just erase the wrong one. When I checked my score afterward, that exact question showed up as null and void, exactly as the sheet’s own instructions had warned. I had read those instructions earlier that same day and still managed to make the mistake they specifically called out.
If you are preparing for ATMA, the AIMS Test for Management Admissions, and looking into how the actual OMR answer sheet works, I have gone through this exact sheet multiple times during my own practice. I want to walk you through every rule and section, based on what actually tripped me up along the way.
Why the AIMS ATMA OMR Sheet Feels Stricter Than Most
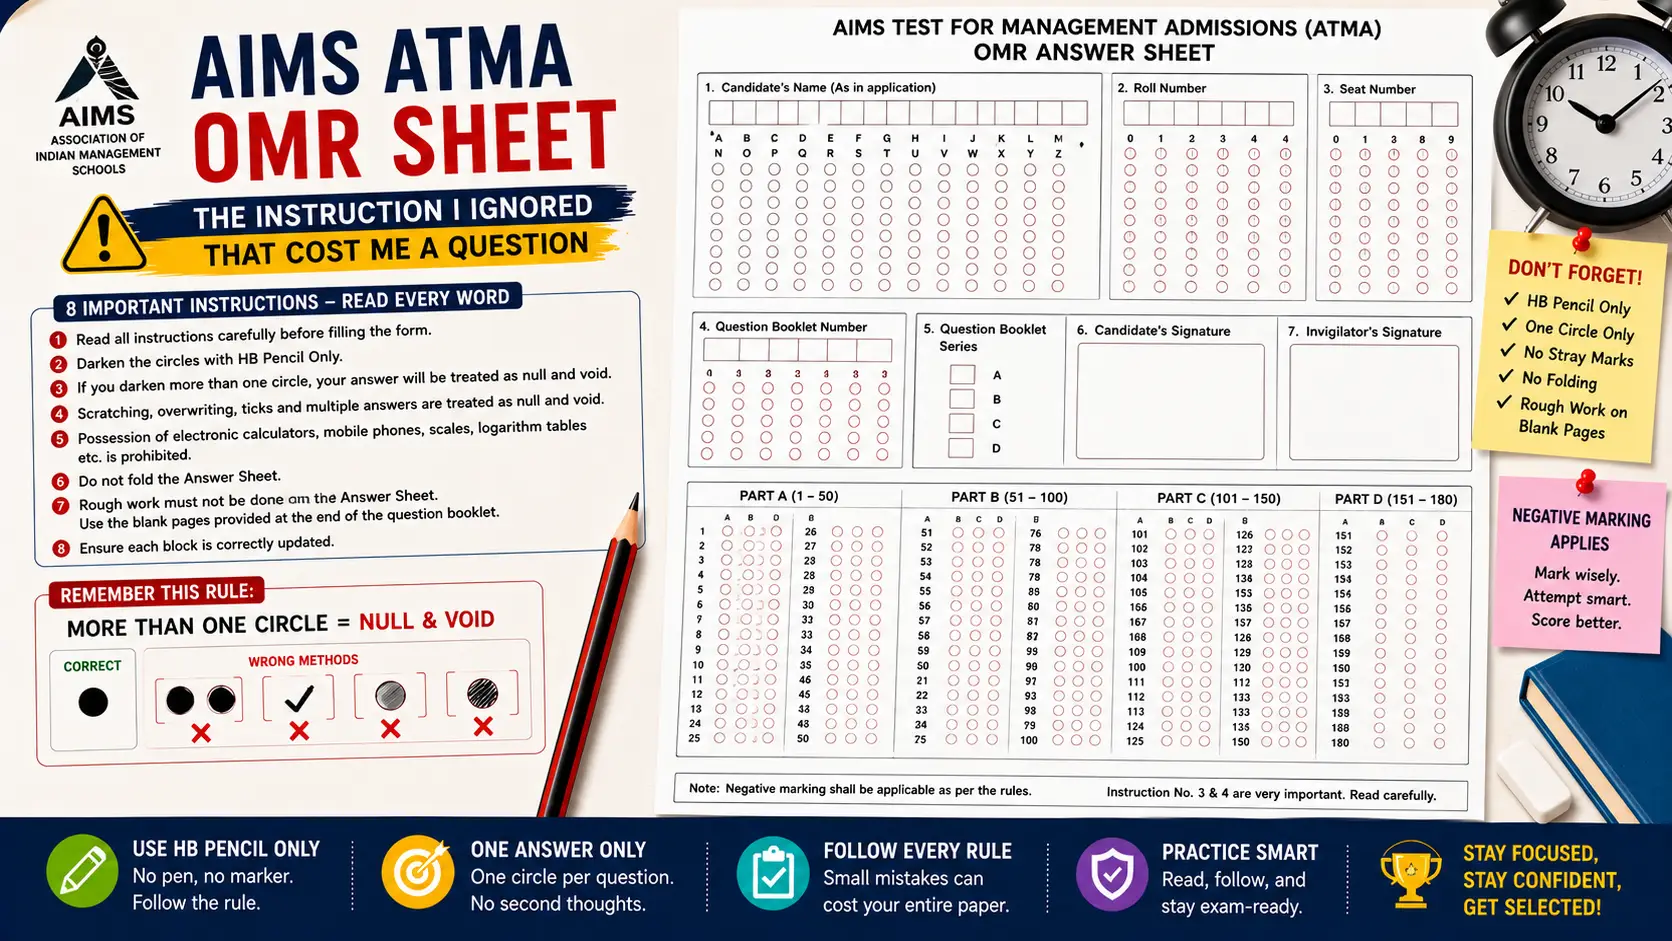
Right at the top of this sheet, before you even reach the answer grid, there is a numbered list of eight clear instructions. The very first line tells you to read all instructions carefully before filling the form, and I genuinely underestimated how literally that instruction was meant. Every single rule that follows connects directly to something that can affect your actual score, not just formality text you can skim past.
The second instruction is one that caught me off guard the most. It specifically states that you should darken the circles with HB Pencil Only, which is the exact opposite of several other exam sheets I had practiced with before that required blue or black pens instead. Switching my practice tool from pen to pencil, purely because of this one sheet’s specific rule, took a conscious adjustment on my part.
The Rule That Actually Cost Me a Question
Instruction number three states plainly that if you darken more than one circle, your answer will be treated as null and void. Instruction four goes further, stating that scratching, overwriting, ticks, and multiple answers are all treated exactly the same way. I read both of these lines during my very first practice session, yet still ended up marking two circles for one question, assuming I could clean it up later.
That single mistake taught me something important about how this sheet actually works. There is no room for indecision once you touch the pencil to the paper, since even a planned correction attempt through erasing can leave enough of a mark to count as multiple answers. I now treat every single question with a firm, final decision made before I even pick up my pencil to darken anything.
What Else the Instructions Specifically Prohibit
Instruction five lists out banned items rather than marking behavior, stating that electronic calculators, mobile phones, scales, and logarithm tables are strictly prohibited during the exam. I remember being a little surprised at scales and logarithm tables being called out specifically, since I had not thought to bring either of those to a management entrance exam in the first place. This instruction genuinely tells you a lot about how strictly AIMS controls the exam environment overall.
Instruction six is short but important, stating clearly that you should not fold the answer sheet under any circumstances. Instruction seven addresses rough work directly, stating that it must not be done on the answer sheet itself, and instead you should use the blank pages provided at the end of the question booklet. I made the mistake of doing a quick calculation in the margin of my practice sheet once, before remembering this exact rule and correcting my habit going forward.
Understanding the Candidate Details Section
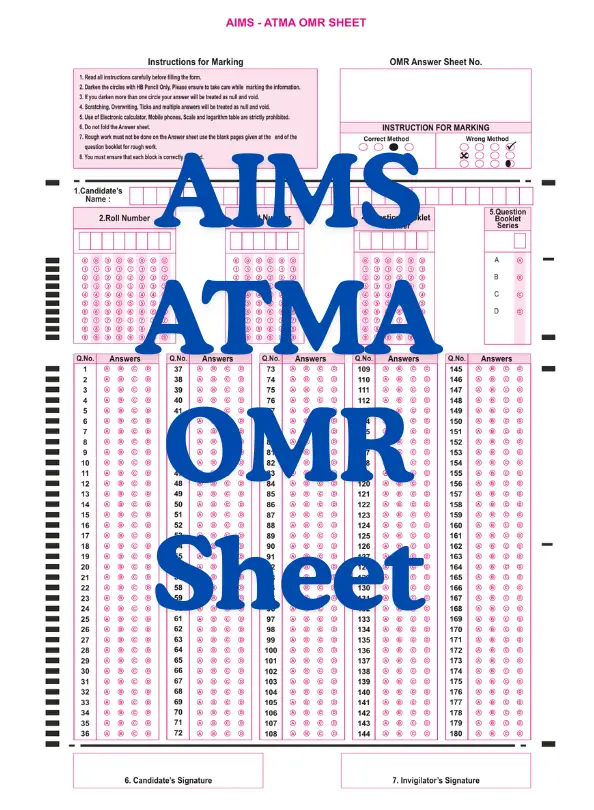
Below the instructions, the sheet has a structured details section split into seven numbered fields. These include Candidate’s Name, Roll Number, Seat Number, Question Booklet Number, Question Booklet Series, Candidate’s Signature, and Invigilator’s Signature. Each of the numeric fields, like Roll Number and Question Booklet Number, comes with its own grid of digit boxes and matching 0 through 9 circles underneath, similar to the answer bubbles used for questions.
Instruction eight, the final rule listed at the top, states that you must ensure each block is correctly updated. Reading this alongside the detailed candidate section made it clear that AIMS treats this header information with the same seriousness as your actual answers. Skipping or rushing through the Roll Number, Seat Number, or Booklet details section risks the same kind of scoring problems as messing up an actual answer bubble.
Step-by-Step: How I Practice With This Exact Sheet Now
After my null-and-void mistake, I built a strict order for filling this sheet, and I follow the exact same sequence for every single practice attempt.
- I pick up only an HB pencil before starting, since this sheet specifically requires pencil marking, unlike several other exam formats.
- I fill my Candidate’s Name, Roll Number, Seat Number, Question Booklet Number, and Question Booklet Series in the header section first.
- I double check each digit grid, confirming that I have darkened the matching circle correctly below every number I wrote.
- I solve each question separately using the blank rough work pages, never writing directly on the OMR sheet itself.
- I commit fully to one final answer per question before darkening any circle, treating every mark as permanent and unchangeable.
- I darken exactly one complete circle for each question, checking that I have not accidentally touched a neighboring option.
- Since the sheet spans a full 180 questions, I periodically check my question number against the actual booklet to avoid drifting off track.
- I sign in the Candidate’s Signature box at the end, treating every practice round as seriously as an actual exam submission.
This exact order stopped me from rushing carelessly through answers, which is honestly where most of my earlier mistakes on this sheet actually happened.
A Mistake Beyond the Double-Marking Issue
Beyond marking two circles for one question, I also once folded a completed practice sheet in half to fit it inside my study folder, forgetting that instruction six specifically prohibits this. The crease line ran straight through several answer rows, and when I later tried checking my responses against the answer key, a few marks near the fold were genuinely harder to read clearly. This taught me to store my printed ATMA practice sheets flat, inside a proper folder, rather than folding them out of convenience.
Real Example: Why Committing to One Answer Matters
A friend of mine preparing for ATMA alongside me developed a habit of always solving every question fully on rough paper first, writing out her final answer clearly before touching the actual OMR sheet at all. This meant that by the time she picked up her pencil to darken a circle, there was zero hesitation or last-minute doubt involved. She told me this single habit, built directly around this sheet’s strict null-and-void rule, noticeably reduced her careless marking mistakes across several months of practice.
I adopted this exact habit after seeing how well it worked for her, and it genuinely changed how confidently I approached each question during timed practice sessions. Knowing I had already fully decided my answer before marking anything removed the temptation to second-guess myself mid-bubble.
Common Mistakes to Avoid
Based on my own experience and details taken directly from the actual sheet’s printed instructions, these mistakes come up most often with the AIMS ATMA format.
- Using a pen instead of the specifically required HB pencil mentioned in the second instruction.
- Darkening more than one circle for the same question, which the sheet explicitly treats as null and void.
- Attempting to scratch out or overwrite a marked answer instead of committing to a final choice beforehand.
- Doing rough work directly on the OMR sheet instead of using the blank pages at the end of the question booklet.
- Folding the answer sheet, which damages answer rows and goes directly against the sheet’s own instructions.
- Rushing through the candidate details section without correctly updating every single block as instructed.
Catching even a couple of these mistakes early during your own mock practice genuinely reduces the risk of losing marks over avoidable errors.
Final Thoughts
The AIMS ATMA OMR sheet leaves very little room for hesitation or mid-answer changes, and understanding its strict rules properly makes a real difference to your preparation. I only understood how seriously this sheet treats double-marking after losing an actual question to my own indecision during practice. Once you commit fully to one final answer before darkening anything, this sheet stops feeling risky and starts feeling like a fair, predictable system.
Practice with a proper AIMS ATMA-style OMR sheet regularly, using only an HB pencil and committing to your answers on rough paper first. By the time your actual ATMA exam day arrives, filling this sheet correctly and confidently will feel completely automatic, leaving your full focus on the questions that truly decide your management admission chances.